- Plastic Sheet
- Engineering Plastics
- Architectural Products
- Plastic Welding
- Chemicals & Polymers
- Industry Search
| Privacy policy | Terms of Conditions of Sale |
Designed by Openseed Digital Consultancy
 November 7, 2016
Six uses for acrylic sheet by PLEXIGLAS® is just the beginning…
With its versatility, durability and sheer beauty, PLEXIGLAS® is revolutionising design and
 August 17, 2017
PLEXIGLAS® Satinice Frosted Finish Acrylic Standout On New Footy Show Desk Set Design
Channel 9’s The AFL Footy Show was opened with a set revamp
 March 2, 2016
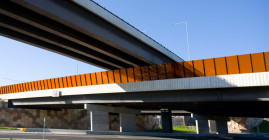
EastLink project: Plastral supplied PLEXIGLAS noise barrier to one of Melbourne’s largest urban road developments
Transparent noise barrier maintain natural views and aesthetics
 May 30, 2016
PLEXIGLAS® launched the new 2016 trend colours for Satinice range
For the first time Pantone® has chosen two colours as the colours of